Week of Weird Constructions 3
This week I worked more on adding new pieces to the MakerGrid and perfected my spool holder. I also designed a new LED panel and experimented with an HC-05 Bluetooth module for communicating with a Raspberry Pi Pico.
MakerGrid on Prusa Printers and Thingiverse
This week I finally took the time to upload the first basic parts to the two 3D print model sites:
Maybe someone finds the MakerGrid concept as useful as I do. As you can see further down, I even applied it to other printed parts now.
More MakerGrid Parts
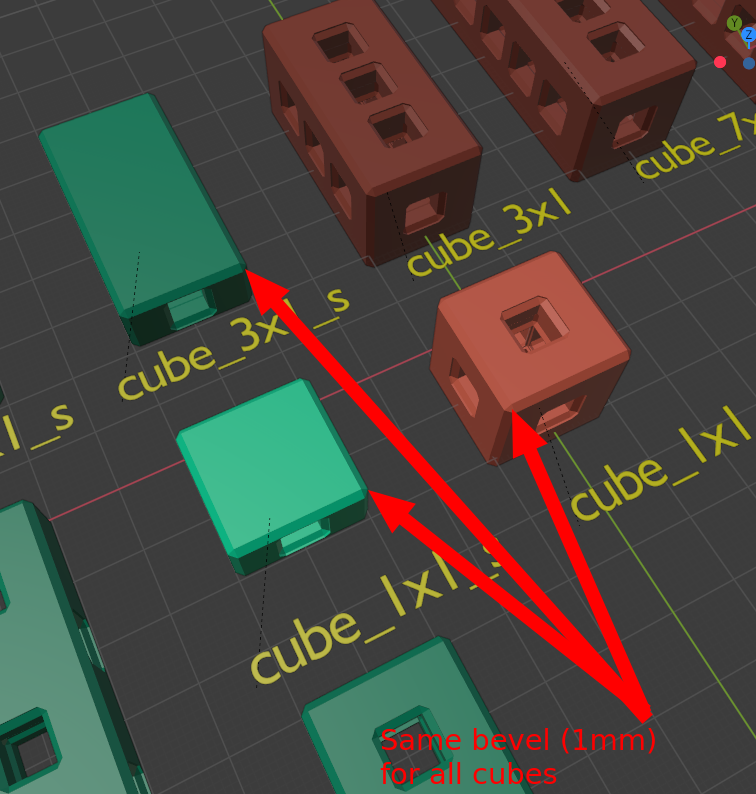
First I fixed the inconsistent bevels of the building cubes of the MakerGrid, making the mall 1mm for a more consistent look and feel.
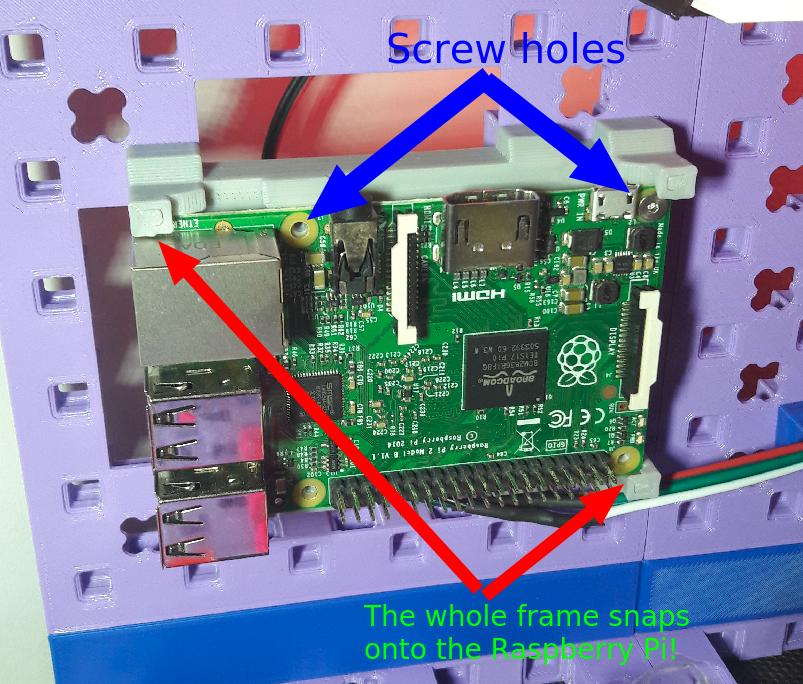
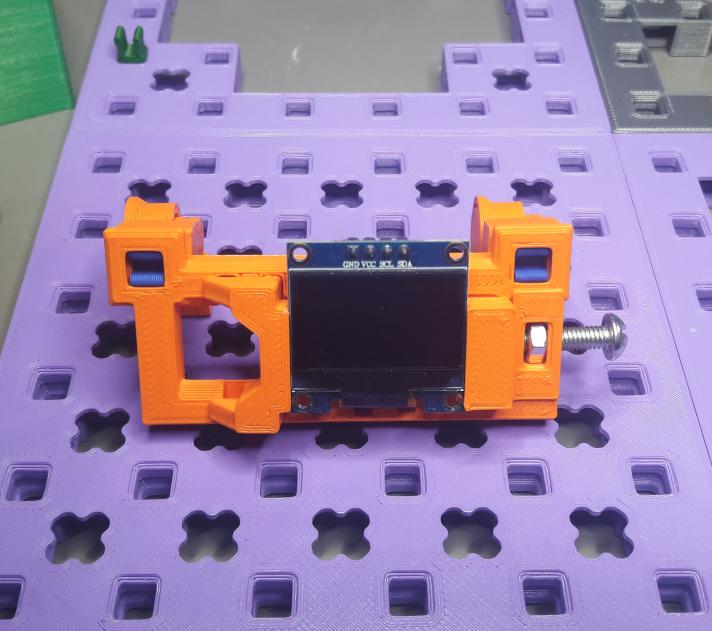
Next up on my list was perfecting the Raspberry Pi holder! I perfected the snap on functionality by making the shorter edges thinner and I also added hole cutouts for the M2.5 screws. The holes work great for directly screwing in the Raspberry Pi onto the MakerGrid holder:
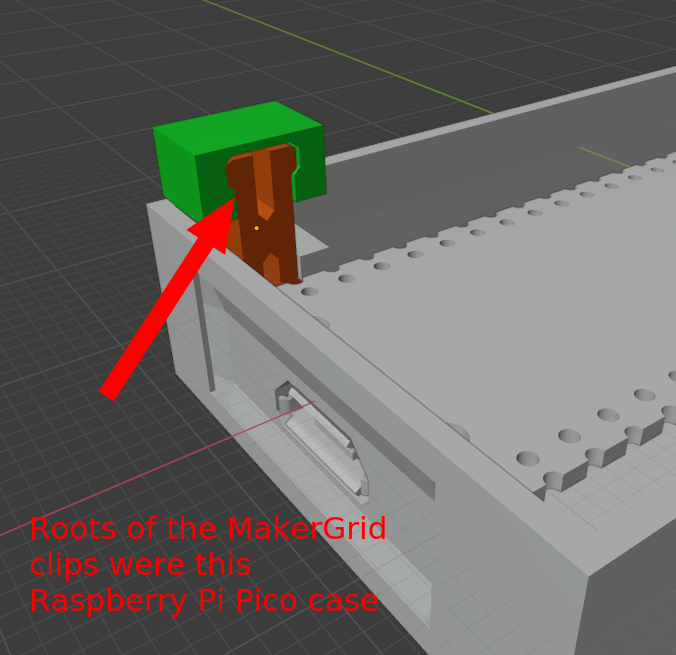
The original clip design came from the small Raspberry Pi Pico case I designed even before coming up with the MakerGrid idea:
I felt adventurous and decided to dive deeper into 3D printing design and decided it was time to give the MakerGrid a new angle with angled joints:

These parts were the first print in place parts I designed for 3D printing, and they were certainly not my last. It works remarkably well to print parts in place! Also notice the extra part with the long slot in it. It allows for aligning odd angles with the MakerGrid bases.
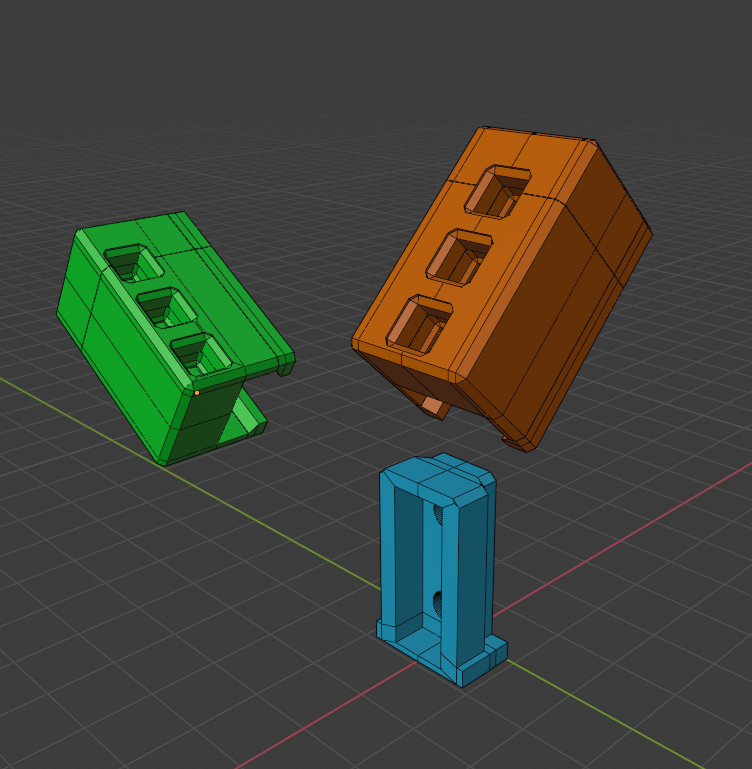
And so it came, that I tried to design a small vise for the MakerGrid. The objective was to make it possible to allow quickly mounting almost anything to the bases with the clips. The vise took many iterations until I could settle onto one design. Here are the prototypes that lead me to the final design:
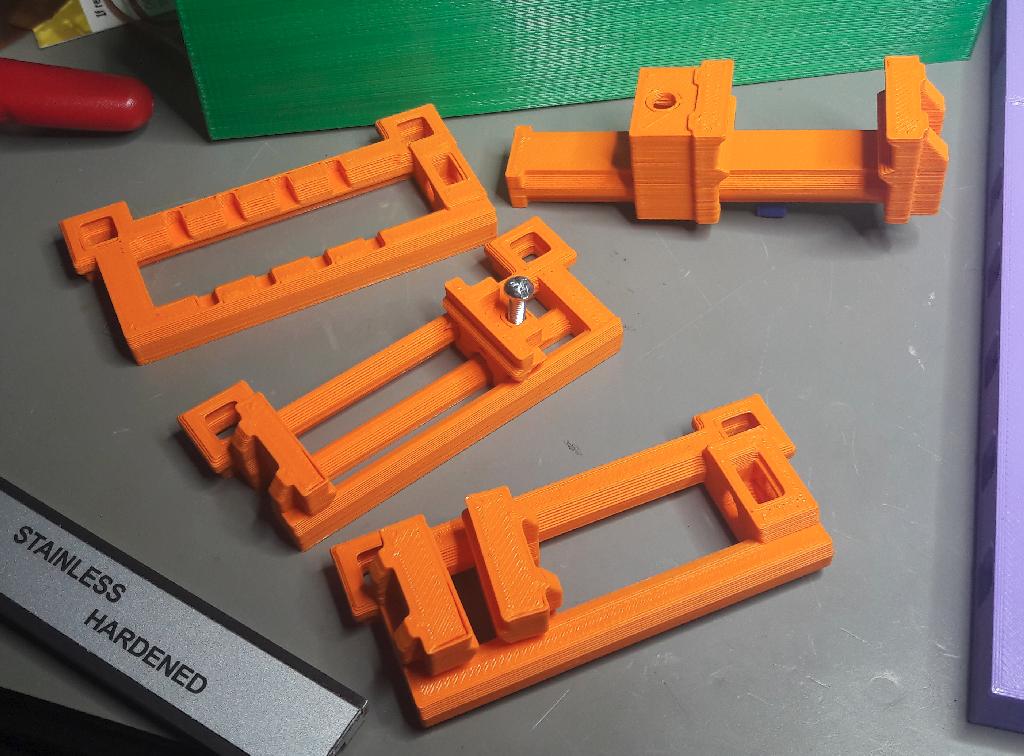
Every single one allowed me to learn and come up with the final design. Here a picture of it in combination with the angle joints.
Spool Holder Improvements
Two weeks ago I introduced an article about my new spool holder design, which had M4 nut holes for extensions. Well, I now came up with an extension:
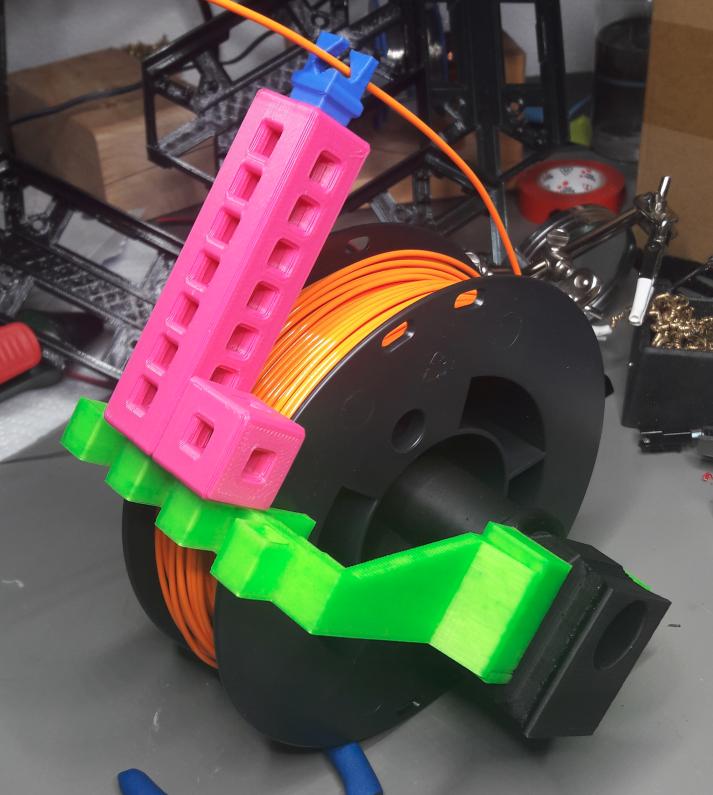
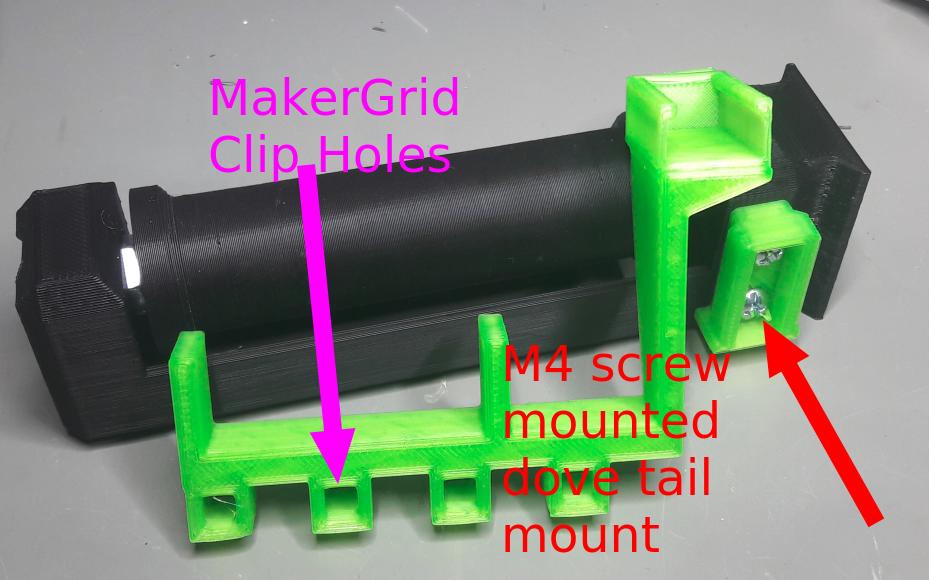
You can see, not only did I use the M4 screws to mount a dove tail mount to the original spool holder, but I also printed the holder arms with MakerGrid holes for further customization:
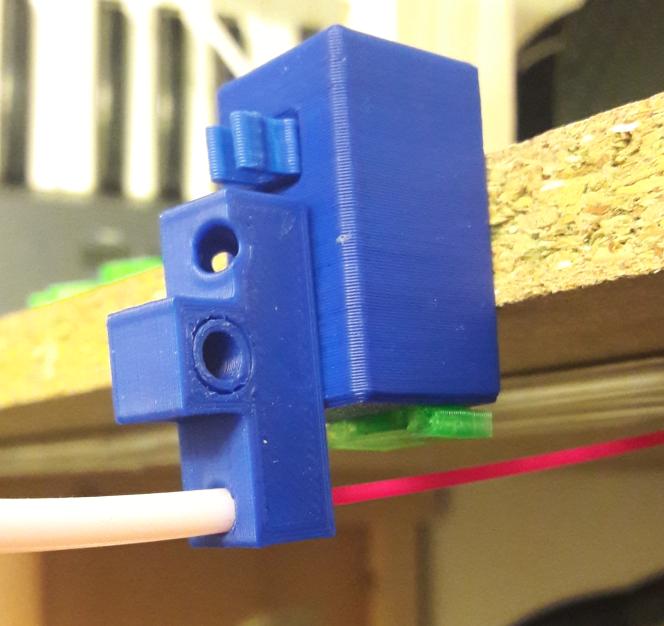
As part of my endeavor of improving my 3D printer setup, I also printed more dovetail parts for the MakerGrid:
I screwed these onto my shelf to clip a PTFE tube holder onto it:
The above mentioned files are also in my MakerGrid repository, even though not properly index at the time of this writing: See https://github.com/WeirdConstructor/3DPrining_MakerGrid/tree/master/blender/utils where you will find:
m4_dovetail_mount*.*pfte_tube*.*
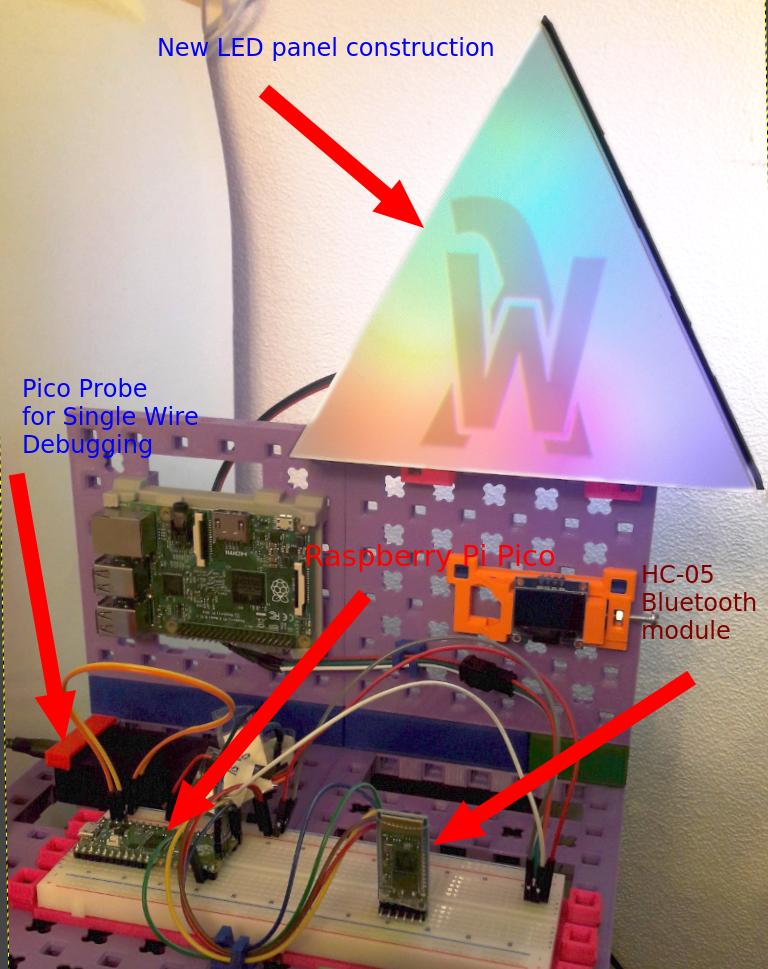
Bluetooth Controlled WS2812 using a Raspberry Pi Pico
I did also dive into finally bringing together the Raspberry Pi Pico with the HC-05 Bluetooth module and a new LED panel creation. I might write more detailed project description about this in future once I have finished it, but here is a rough overview of it:
The experimental firmware for this can be found here:
It features a little very lightweight programming language for the LED strips,
it works by providing up to 256 color registers and a small byte code interpreter
to calculate which LEDs get which color register. On top of that the serial protocol
is very rough and uses # and ! as start and end markers for a piece of program.
Here is simple example:
#c44ffff c00ffff ceeffff L0009; %l03!
Lets dissect this example:
#       - start of code marker for serial reading

c44ffff - 'c' reads a color into the next color register.
          A color is defined by 3 HSV color hex values, where the first
          byte (44) describes the hue, the next byte the saturation (ff)
          and the last the value/brightness (ff).
c00ffff - Color in register index 1
ceeffff - Color in register index 2
L0009   - 16 bit unsigned integer in hex notation
          to define the LED strip length.
;       - End of definitions
%       - Modulo operation returning the register to read the current
          LED in the LED strip from
l       - 'l' is the first operand to '%', which is the LED index in
          the LED strip for which the color register index is being
          calculated.
03      - '03' is a 8 bit integer in hex notation. Here we rotate through
          the 3 color registers for the 9 LEDs in the strip.
!       - End of code marker for serial reading
I will continue to work on this, but I am awaiting a new Bluetooth module which will allow me to communicate directly from a web API with the LED lights. And ultimately I will just slap a simple color control front end to this. I might also totally redesign the above byte coded little signal flow language or I extend it. It was just a quick hack for now to get something working.
